Unimog Camper Wiring: Tapping Tail Lights for Marker Lights
Problem 1: Keeping the Elements Out – Sealing Vintage Hella Tail Light
If you own a vintage Unimog—like my 1984 U1300L—you know that half the battle of projects is finding old parts. One of my guiding principles on this truck is to keep it original when I can. Recently, while figuring out how to tap into my rear taillights to run marker lights for the camper box, I ran into a common problem: missing rubber doohickys.
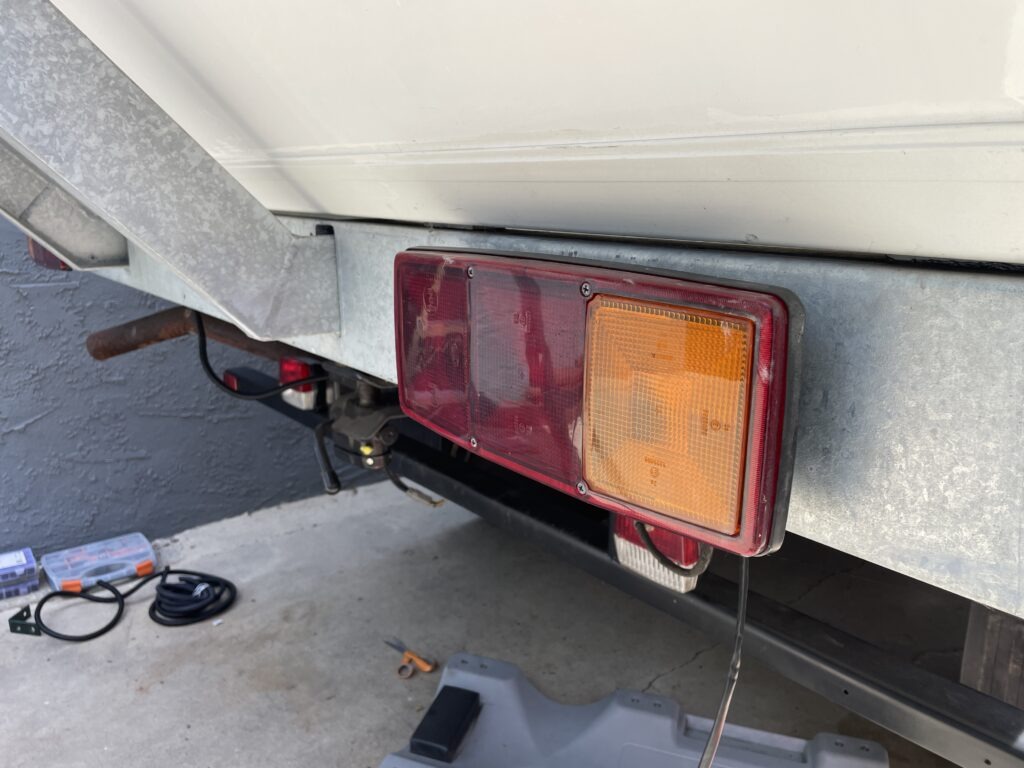
My truck still has the original Hella 3-chamber commercial tail lights (you’ll see lens number 53250R7 stamped on them). Most people upgrade to a newer LED tail light when they do the RV conversion but I love having the old parts on there. I have upgraded the bulbs with LEDs so I have the brightness of LEDs while keeping the vintage look.
I really don’t see any problems with the old lights, they are durable, easy to use, and I can run LED or conventional bulbs – basically, whatever I can find, wherever I am at in the world. I have always wondered what you do when one of the new one piece LED tail lights burns out – do you have to replace the whole thing? Does that mean you have to carry a huge spare? And then rewire the new one when replacing?
Finding the Elusive Hella Grommet
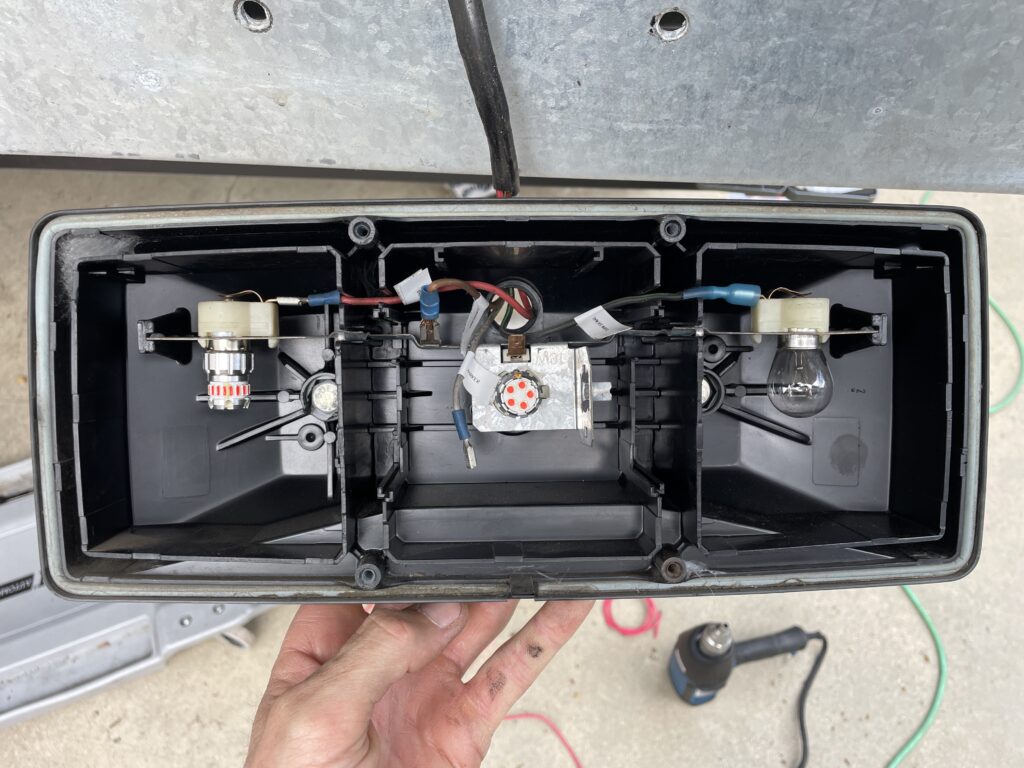
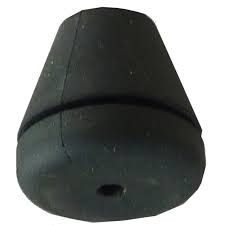
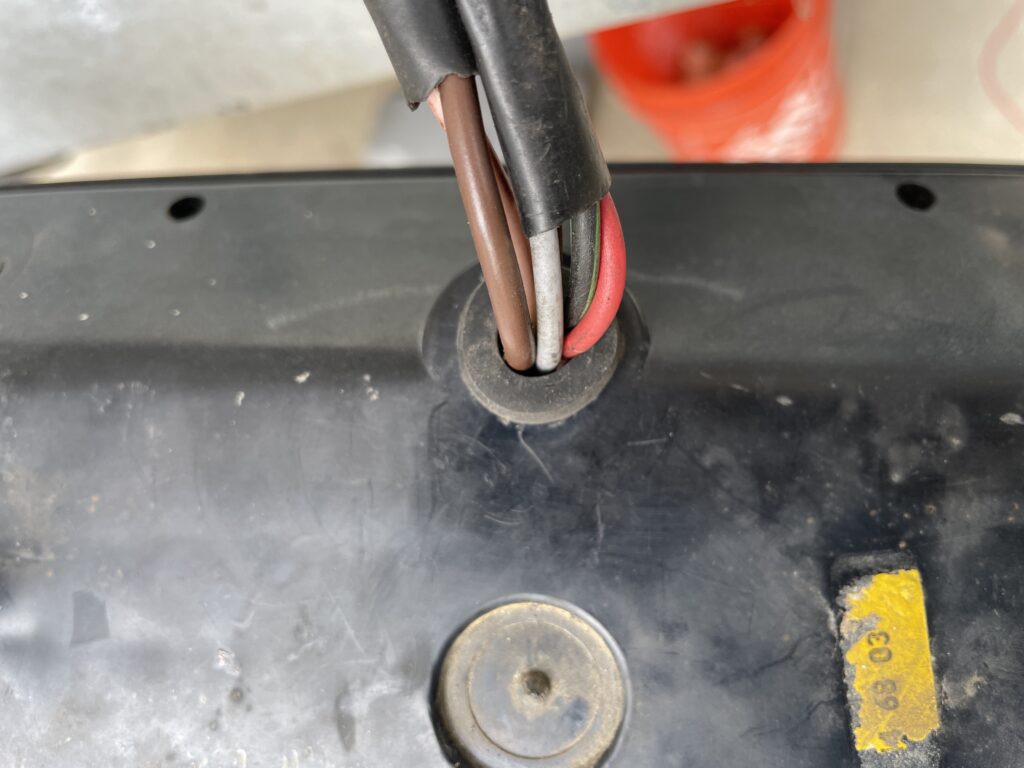
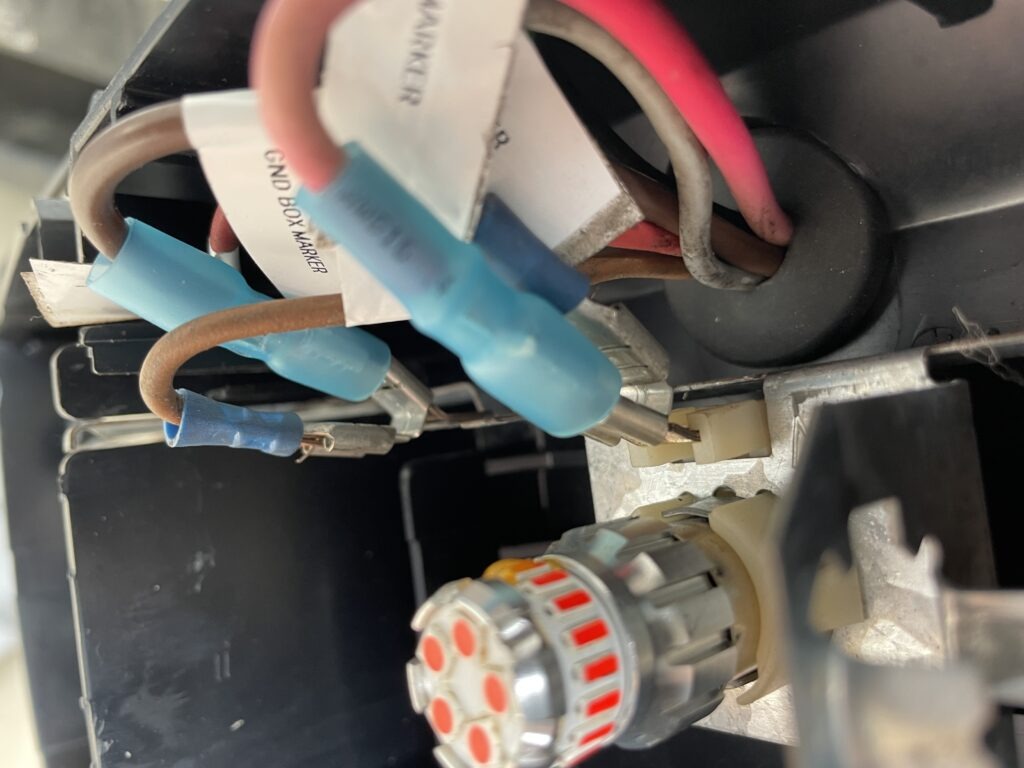
When I opened the passenger side housing, I realized the rubber grommet that seals the wire entry hole on the back of the plastic bucket, was completely gone.
Leaving that hole open seems like a guaranteed way to fill my housing with water, mud, and eventually, copper corrosion. Also, LED bulbs seem to really not like water – I left some out in the rain once.
Because these are commercial European parts from the 80s, you can’t exactly stroll into a local auto parts store in the US and grab a replacement off the shelf.
If you are a purist and want the exact OEM replacement, here are the numbers you need to hunt down.
- Hella Part Number: 9GT 074 132-001
- Mercedes-Benz OEM Part Numbers: A 000 997 80 81 (or
A 000 997 80 91)
I checked Expedition Imports with no luck. The only tail light they sell is a newer different light. The hole in the back of that light does look like it could be the same size though, so maybe calling Scott would be a good idea.
The DIY Fix
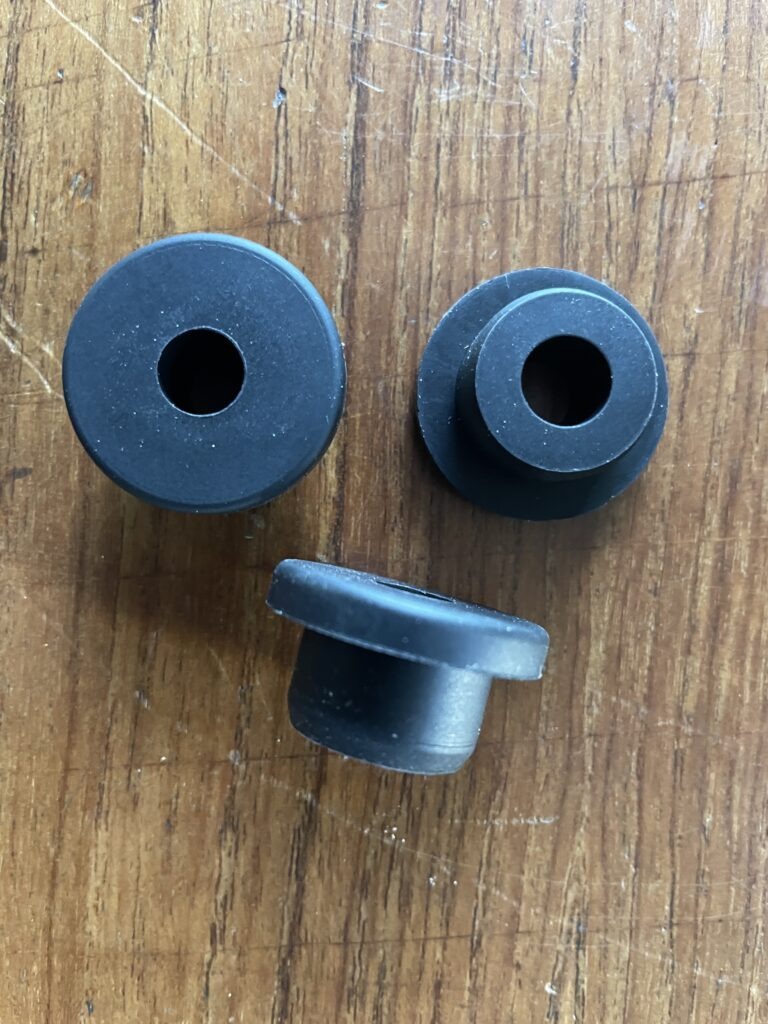
After searching the web for the real part, I ended up measuring the hole (17mm) and going to Amazon which is always a last resort for me. Mcmaster-Carr had some possible options but nothing obvious.
On Amazon I found this: uxcell 6Pcs Rubber Grommets 17mm Drill Hole, 8mm ID Hole Top Hat Grommet Black Silicone Rubber Hole Plug Gasket for Wiring, Automotive
For the price, I just took a shot. Turns out (this rarely happens) it was a perfect fit. I know it is cheap Chinese rubber and probably won’t last that long but for what it does and what it costs, who cares – I have five more so I can change it every year or two, no big deal. Also, it will never see direct sunlight.
Problem 2: connecting camper marker lights to the running lights
All of the Splicing options
The whole purpose of going into the tail light was to figure out how to split the running light circuit to feed my camper box marker lights. Splicing has actually been a pretty big issue for me in the past. How do you turn one wire into two (elegantly)? Or, how do you splice one wire into two wires (a Y splice).
This is a super easy thing anywhere inside the truck. Just use Wago connectors. I freaking love WAGO. Easy to use, secure, and easy to change later. You can quickly and easily split one wire into 2, 3, 4, or 5 wires. They are awesome, like tiny, expandable, tool-less bus bars.
The problem is on the outside of the truck. Weather! The Wago connectors are not weather proof or even resistant. You would think someone would make a connector like the Wago that is sealed. Nope. Here are the options:
- Vampire clips (Scotchloks): I think these are widely regarded as an absolutely non-option. Slicing into your 40-year-old wiring harness with a cheap piece of plastic is asking for a failure
- The Quick-Disconnect (Bussed Deutsch Receptacles): Apparently Deutsch makes a specific “Bussed” receptacle where all the pins are bridged internally by a solid copper bar. You crimp standard pins onto your truck wire, your taillight wire, and your camper wire, and shove them all into the same waterproof plug. This is complicated and I haven’t tried it.
- The “Wago” Alternative: If you love Wago lever nuts for their convenience, check out Wago Gelboxes. You make your connection, snap the box closed over it, and a silicone-free gel completely encapsulates the splice to an IPX8 waterproof rating. It’s not great for temporary connections, but it’s fantastic for permanent tuck-away jobs. This is solid but the boxes are bulky and if you ever need to do a modification, the gel is gooey.
- The Permanent Route (Military Splice): If you want a permanent, inline splice without bulky connectors, do a proper military “poke-and-wrap” solder joint. I am not a fan of solder – it is a pain in the ass. Nate at Explorist.life argues it makes the wires brittle and because of that, the ABYC forbids it. I am out.
- The Marine Standard (Adhesive-Lined Butt Connectors): This is 100% ABYC compliant. Instead of a complex plug, you cut your taillight wire. You strip both ends. You take the “incoming” taillight wire and twist it together with your new camper wire. You shove both of those into one side of a step-down adhesive-lined butt connector, and put the “outgoing” taillight wire into the other side. Crimp both sides, then hit it with a heat gun. It’s cheap, permanent, and bulletproof. The downsides:
- You have to cut it out if you ever want to remove it.
- Since you have two wires at one end, you have to use a bigger butt connector. Then the other side is too large for the single wire. This is solved by using Step-Down Butt Connectors. I have never actually tried this but it seems like a good idea.
My Choice: the piggyback method
This is the route I took. First, it seems very clean to me. Second, if I ever need to disconnect the camper lights, I don’t have to cut any wires.
I bought these: Ancor 210613 Marine Grade Electrical Double Male-Female Adapter (25-Pack), Beige.
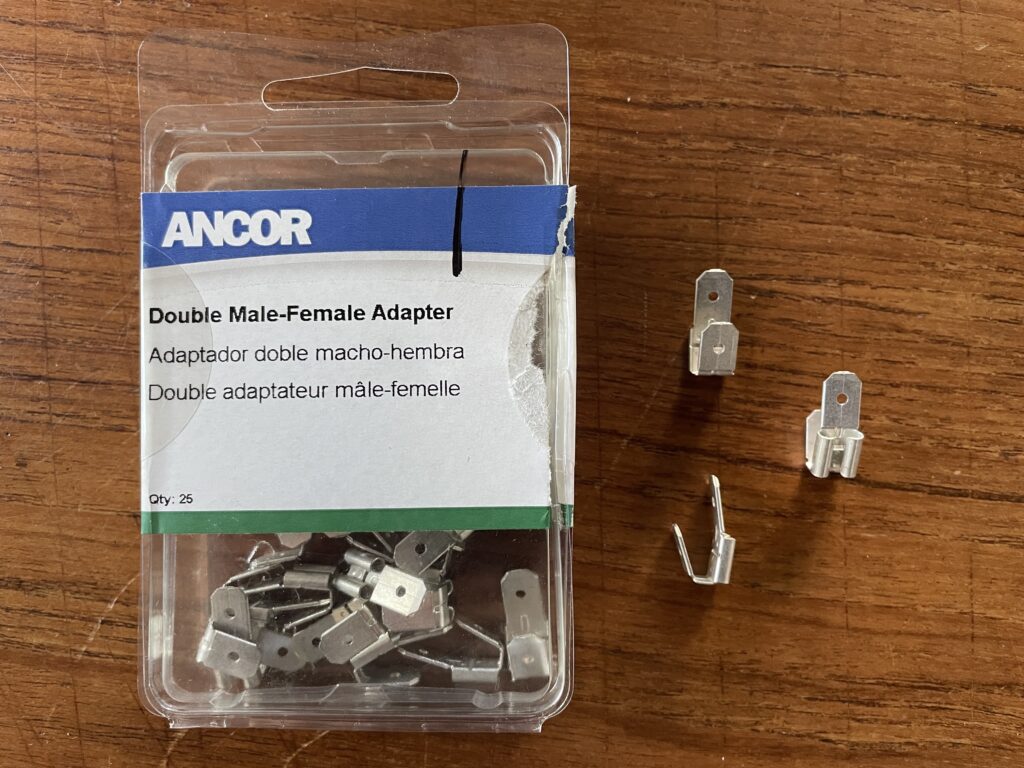
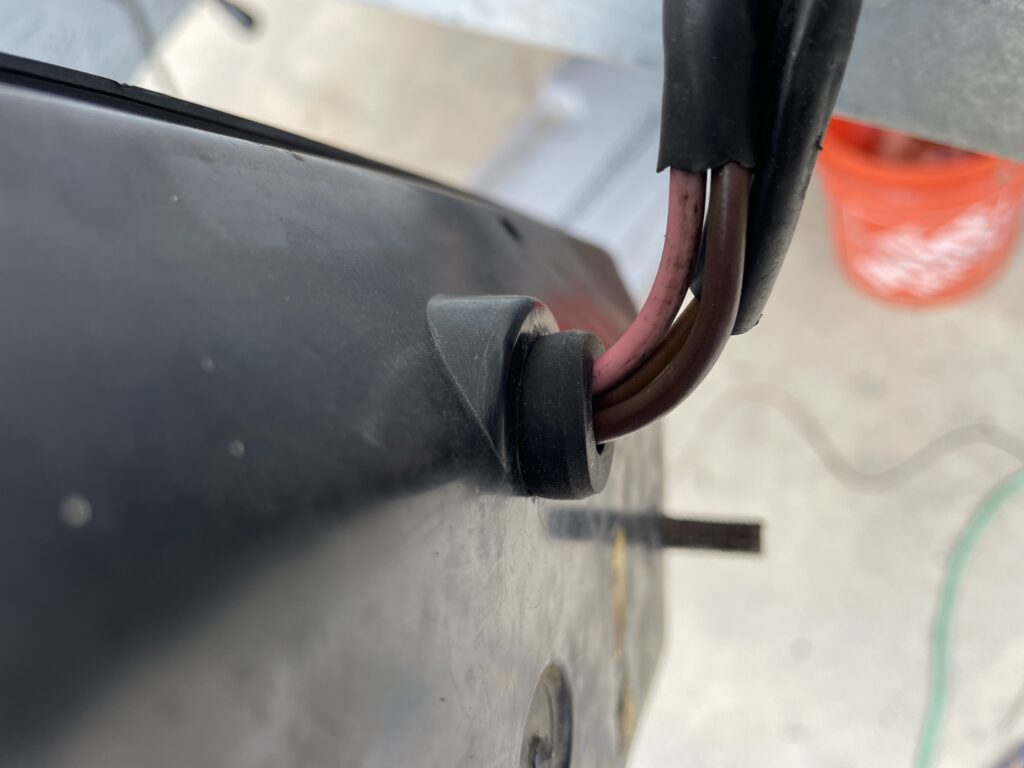
All you do is slide the adapter onto the male post of the running light bulb in the tail light. Boom, you now have two male posts. Connect the incoming running light wire to one. Connect the outgoing marker light positive wire to the other and Bob’s your uncle. Do the same thing for the ground and you are done. Here is the final product. Also note the rubber grommet and how tight it is on the wires.
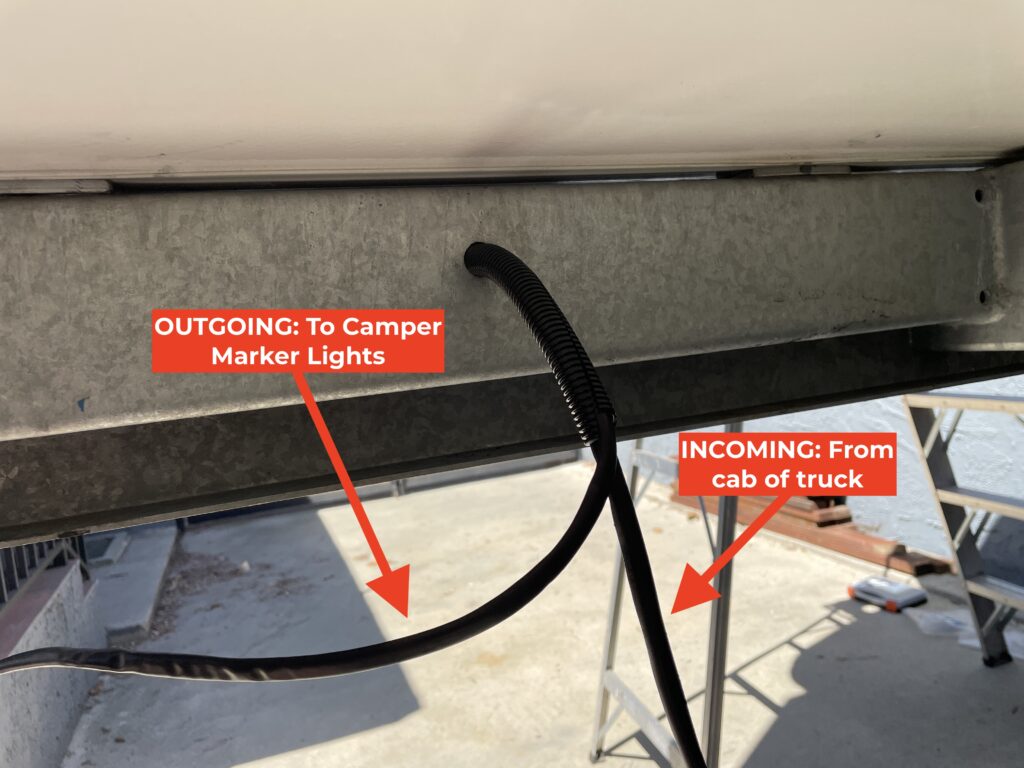
Now, underneath the box, you just have wires. No connections to worry about at all.
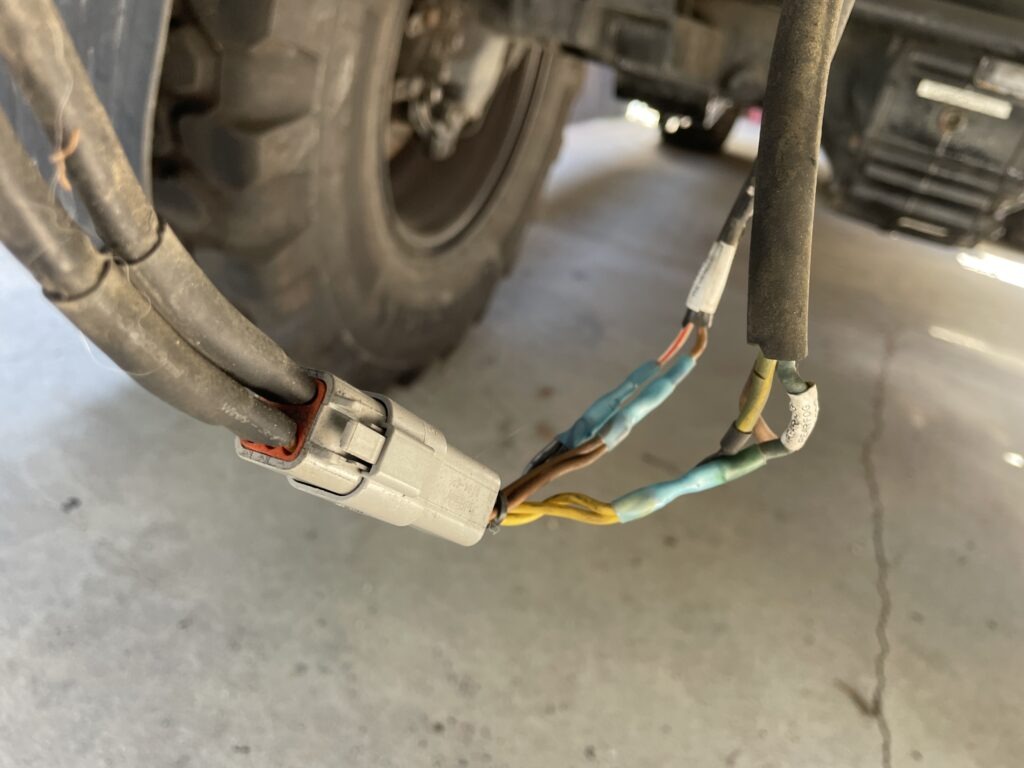
It sure is a lot cleaner than this mess. This is for my reverse and fog lights. It is an example of the buttsplice option. It does work and is solid but looks horrible. Someday I will rewire the whole backend from the junction box on back.
Warning: Important Note on Power Draw
This piggyback method is perfectly safe because my camper marker lights are LEDs, which draw almost zero amps. If you are adding a bunch of old-school incandescent halogen marker lights to this (or any) circuit, you might overload the wiring or blow the running light fuse. Stick to LEDs if you are tapping existing circuits!
Or better yet, do the calculations. Explorist.life has a fantastic wire size calculator that can also tell you fuse size. Add up the amperage of each light that will be connected to this wire and put it in the calculator.
The “Vibration” Tip
Unimogs shake. A lot. I have been told that piggyback spade connectors can sometimes vibrate loose over washboard roads.
The Fix: Give the female spade connector a tiny squeeze with pliers before sliding it onto the bulb post ensures a tight, vibration-proof fit. Mine didn’t need this – they were very tight already. Adding a tiny dab of dielectric grease will also keep the corrosion away if water ever does get past your Amazon grommets.